


Thanks for this MacMan! Of course, this
works great (if used correctly). I've use this post to make my Snow
Leopard installation work too. This looks like a lot of stuff, but the
whole process only takes about 2 hours. 3 if you include putting the
parts together to build your system.
Here's how:
* Purchase Snow Leopard upgrade DVD as per instructions above or here: Mac OS X 10.6 Snow Leopard - Apple Store (U.S.)
* Download appropriate DSDT file for motherboard & save to USB Flash drive (I used a 4GB).
* Download iBoot & burn to CD/DVD.
* Download SL 10.6.8 Combo Update from Apple, here: Mac OS X 10.6.8 Update Combo v1.1
& save to USB Flash drive with your DSDT.
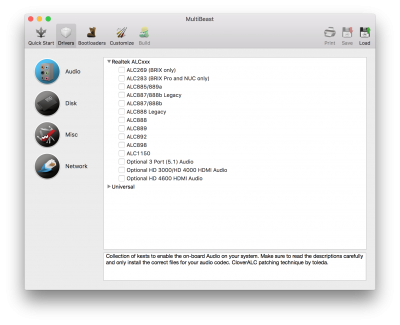
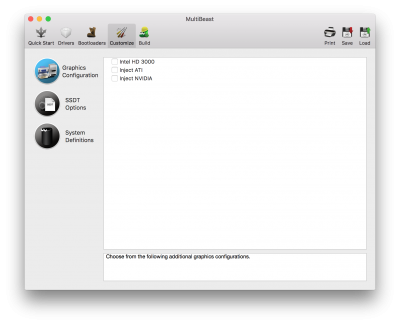
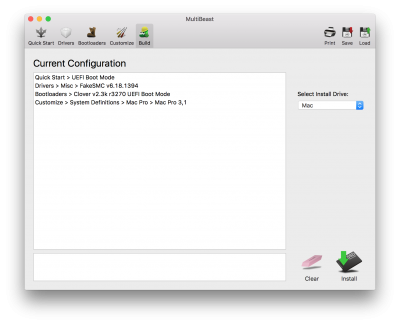
* Download Multibeast for Snow Leopard & save to USB Flash drive.
* Build system as per instructions with 1.5TB HDD installed (you'll have to slice it up once you get to the installation).
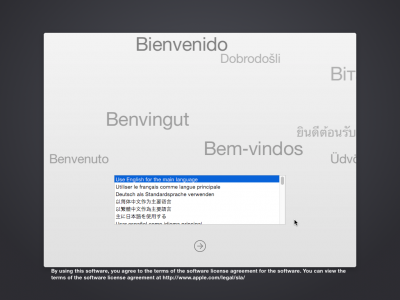
* Boot with iBoot
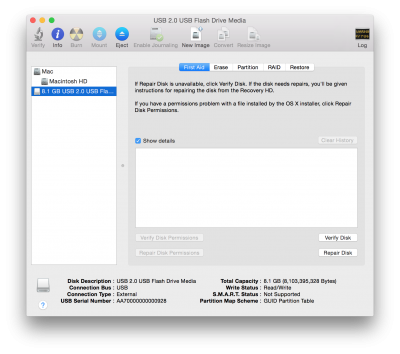
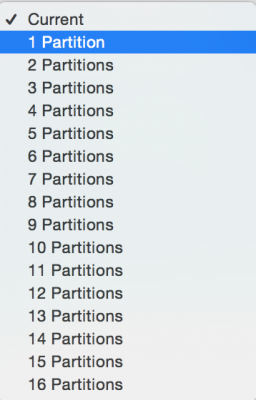
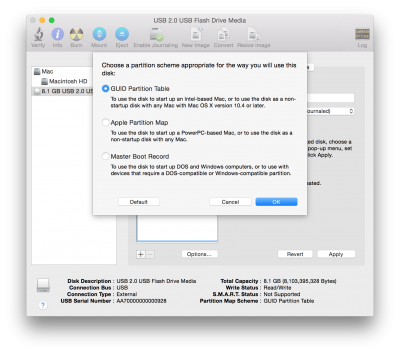
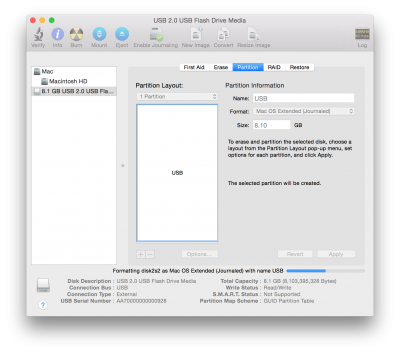
* Use Disk Utility to slice 1.5TB drive at 600GB boot partition, named "Snow Leopard HD" & the other 900GB partition named "Extra"
* Install Snow Leopard as per 'regular' instructions.
* When "done" have boot0 error, so remove this HD for now...
* Install another 500GB HDD (could use a drive as small as 20GB as long as it's SATA or Solid State) & install SL exactly the same way on this drive, EXCEPT make only 1 partition as per TonyMacx86's original instructions.
** NOTE ** I suggest that you name the partition something simple, like "Mac HD" & NOT the same thing you named your other boot partition.
* Once THIS drive is built, you will NOT have the boot0 error, unless they change the architecture on the smaller drives too.
* Put leave the smaller (good) drive in the system & put the bigger (not booting) drive in with it. If your drive is 6GB/S drive, you can now move it to the white SATA controller port too.
* Boot the system (to the only drive that works).
* Once your system is up, open Drive Utility. Unmount the the first drive you built with the boot0 error, the "not booting" drive, that's named "Snow Leopard HD".
* Open a Terminal window. I suggest you take a moment to understand what you're going to do next.
First, you will not be able to use MacMan's command unless you can su to root first. Since you probably don't know what that means, you can't use the command.
You need to use "sudo" to make the command work. I suggest you take a couple of minutes to get the info on "sudo", by typing (yup, you guessed it!!) "info sudo" in the terminal window. You can arrow down to go down the page & press "q" to "quit" & get out of info. Using "sudo" is sort of like "assuming the identity of root" from now on.
In the Terminal window once you type 'sudo' & the command, you'll have to enter your password to execute the command. Also, in OSX from there on out YOU ARE root too, so any other commands you type can be dangerous. You only have to type sudo once!! So if you mess up the command that MacMan has graciously given us, you don't have to type 'sudo' again.
* Take a deep breath. Take a shot of Tequila. OK. You're ready...
The drive you booted from is named "Snow Leopard HD". The drive you didn't boot from is named "Mac HD". So, the command is :
sudo dd if=/Volumes/Mac\ HD/usr/standalone/i386/boot1h of=/dev/disk0s2
*** But Wait *** Don't type that command!! Copy it & Paste it!! That away you'll be sure to get it right. YES, Terminal WILL let you copy & paste (of course, one is no good without the other). So, copy this whole post & put it in a Text File & put THAT on your USB Flash drive too.
* OK. That wasn't too bad. If you saw some messages that said you messed up, you need to press the "UP" arrow to bring your last command back & then modify the command. You probably messed up the "Mac\ HD" thing. Make sure to take the "sudo" off the front of the command though.
* If you didn't see a message that said you messed up, then you were successful.
* Shut down your system. Remove the smaller drive & boot up your new Snow Leopard Installation!!!
***** Good Luck ***** Thanks MacMan & Tonymacx86 ***** Consider making a donation to keep this site working
Here's how:
* Purchase Snow Leopard upgrade DVD as per instructions above or here: Mac OS X 10.6 Snow Leopard - Apple Store (U.S.)
* Download appropriate DSDT file for motherboard & save to USB Flash drive (I used a 4GB).
* Download iBoot & burn to CD/DVD.
* Download SL 10.6.8 Combo Update from Apple, here: Mac OS X 10.6.8 Update Combo v1.1
& save to USB Flash drive with your DSDT.
* Download Multibeast for Snow Leopard & save to USB Flash drive.
* Build system as per instructions with 1.5TB HDD installed (you'll have to slice it up once you get to the installation).
* Boot with iBoot
* Use Disk Utility to slice 1.5TB drive at 600GB boot partition, named "Snow Leopard HD" & the other 900GB partition named "Extra"
* Install Snow Leopard as per 'regular' instructions.
* When "done" have boot0 error, so remove this HD for now...
* Install another 500GB HDD (could use a drive as small as 20GB as long as it's SATA or Solid State) & install SL exactly the same way on this drive, EXCEPT make only 1 partition as per TonyMacx86's original instructions.
** NOTE ** I suggest that you name the partition something simple, like "Mac HD" & NOT the same thing you named your other boot partition.
* Once THIS drive is built, you will NOT have the boot0 error, unless they change the architecture on the smaller drives too.
* Put leave the smaller (good) drive in the system & put the bigger (not booting) drive in with it. If your drive is 6GB/S drive, you can now move it to the white SATA controller port too.
* Boot the system (to the only drive that works).
* Once your system is up, open Drive Utility. Unmount the the first drive you built with the boot0 error, the "not booting" drive, that's named "Snow Leopard HD".
* Open a Terminal window. I suggest you take a moment to understand what you're going to do next.
First, you will not be able to use MacMan's command unless you can su to root first. Since you probably don't know what that means, you can't use the command.
You need to use "sudo" to make the command work. I suggest you take a couple of minutes to get the info on "sudo", by typing (yup, you guessed it!!) "info sudo" in the terminal window. You can arrow down to go down the page & press "q" to "quit" & get out of info. Using "sudo" is sort of like "assuming the identity of root" from now on.
In the Terminal window once you type 'sudo' & the command, you'll have to enter your password to execute the command. Also, in OSX from there on out YOU ARE root too, so any other commands you type can be dangerous. You only have to type sudo once!! So if you mess up the command that MacMan has graciously given us, you don't have to type 'sudo' again.
* Take a deep breath. Take a shot of Tequila. OK. You're ready...
The drive you booted from is named "Snow Leopard HD". The drive you didn't boot from is named "Mac HD". So, the command is :
sudo dd if=/Volumes/Mac\ HD/usr/standalone/i386/boot1h of=/dev/disk0s2
*** But Wait *** Don't type that command!! Copy it & Paste it!! That away you'll be sure to get it right. YES, Terminal WILL let you copy & paste (of course, one is no good without the other). So, copy this whole post & put it in a Text File & put THAT on your USB Flash drive too.
* OK. That wasn't too bad. If you saw some messages that said you messed up, you need to press the "UP" arrow to bring your last command back & then modify the command. You probably messed up the "Mac\ HD" thing. Make sure to take the "sudo" off the front of the command though.
* If you didn't see a message that said you messed up, then you were successful.
* Shut down your system. Remove the smaller drive & boot up your new Snow Leopard Installation!!!
***** Good Luck ***** Thanks MacMan & Tonymacx86 ***** Consider making a donation to keep this site working

Aucun commentaire:
Enregistrer un commentaire