24/09/2019

FreeBSD, ghostbsd, MidnightBSD, OPNsense, FreeNAS & pfSense


Tous ces fichiers .ISO peut démarrer correctement sous E2B (freeBSD nécessite un numéro de type de partition défini dans le MBR et ne se chevauchent pas comme des partitions).

Cependant, si les images memstick sont disponibles, vous pouvez les utiliser selon les instructions ci-dessous.

Vous pouvez également utiliser des fichiers ISO hybrides à base de FreeBSD (par exemple FreeBSD -11.1.iso ou OPNsense -17.7.5-OpenSSL-dvd-amd64.iso) en utilisant un fichier .imgPTN ou utiliser l'extension de fichier .isoBSD.


Nouvelle extension de fichier .isoBSD dans E2B v1.A5 et versions ultérieures.


Je l' ai testé avec succès FreeBSD -11,1-RELEASE-amd64-bootonly.iso, TrueOS -desktop-18,03-x64-DVD.iso, OPNsense -17.7.5-DVD-OpenSSL amd64.iso, Nas4Free .iso et pfSense -CE-2.4 .4-RELEASE-amd64.iso en utilisant l'extension de fichier .isobsd.
1. Modifiez l'extension de fichier de votre fichier ISO BSD pour mettre fin à. isobsd et copiez - le dans votre dossier \ _ISO \ LINUX (ou tout autre dossier de menu standard).
2. Exécutez \ MAKE_THIS_DRIVE_CONTIGUOUS (exécuter en tant qu'administrateur) .cmd.

Remarque: L' utilisation .isobsd va changer les partitions afin que la partition de E2B disparaît. Pour restaurer la partition E2B, simplement MBR-démarrage à nouveau ou exécuter le \ restore E2B Partition.cmd fichier en tant qu'administrateur.

.isoBSD est pour MBR-démarrage uniquement, et ne fonctionne pas avec tous les BSD ISOs - voir en bas de page pour plus de détails.

Astuce : Si vous démarrez sur un appareil sans tête (pas de d'affichage VGA), configurez l'option de menu par défaut E2B + délai de 10 secondes afin que votre ISO fonctionnera automatiquement à partir du menu principal après un délai de 10 secondes (par exemple , en utilisant \ QEMU_MENU_TEST ou un autre système) .

images memstick
Comment ajouter FreeBSD memstick p ayloads et pfSense memstick charges utiles à E2B.

La version 1.63 de Easy2Boot et un nouvel outil MPI pack v0.044 ou ultérieur prend en charge FreeBSD 9 et 10 images '' de memstick. Pour ghostbsd , téléchargez les fichiers .img et pas les fichiers .iso. Pour MidnightBSD , utilisez le téléchargement de « memstick ».

Si le fichier de memstick contient plusieurs images à l'intérieur (par exemple lors pfSense v2.4), ce processus ne fonctionnera pas.

Pour OPNsense les téléchargements pour les lecteurs USB (par exemple télécharger série), extraire le fichier .img à partir du fichier .bz2 avec WinRAR ou 7zip et suivez les instructions ci - dessous.

bureau GhostBSD4.0

La procédure consiste à utiliser le MakePartImage processus, mais comme les fichiers de FreeBSD sont déjà dans le format correct pour une partition FreeBSD, les fichiers .img ne fait pas besoin de modifier ou de convertir !:

1. Créez un nouveau vide dossier sur le bureau de Windows (ou ailleurs).

2. Faites glisser-déposer le vide dossier sur le MPI_FAT32 raccourci MPI Desktop pour faire un 30MB (ou aussi petite que possible - par exemple 10MB) image de la partition sans charge utile. Si vous êtes invité à un fichier cible, utilisez un nom de fichier avec soit un .imgPTN ou .imgPTNA5 extension de fichier - par exemple FreeBSD_10_1.imgPTN ou FreeBSD_10_1.imgPTNA5.

Ne pas utiliser un nom de fichier qui a des points en elle, car elle apparaît également dans le menu E2B - par exemple FreeBSD10.1.imgPTNA5 ne serait pas un bon nom, car le fichier « FreeBSD10.1 » (voir ci-dessous) serait également visible dans le menu!

3. Copiez le nouveau fichier .imgPTN dans un dossier de menu (par exemple \ _ISO \ LINUX, un 2ème dossier de niveau - NON \ _ISO \ LINUX \ MNU).

4. Copiez votre fichier de memstick FreeBSD dans le même dossier que le fichier est .imgPTN et le renommer pour correspondre au nom du fichier .imgPTN mais SANS extension de fichier - par exemple ,

FreeBSD_10_1.imgPTN (10-30MB)
FreeBSD_10_1 (NO EXTENSION DE FICHIER OU DOTS - par exemple 700MB fichier memstick.img renommé pour correspondre sans extension de fichier)

Astuce : Télécharger le xyz (compressé) version non UEFI, par exemple FreeBSD-10.1-RELEASE-i386-memstick.img.xz puis décompressez pour obtenir le fichier .img. Les fichiers .XYZ sont plus petits que les fichiers .img. J'ai aussi testé cela avec pfSense-CE-memstick-2.3.5 RELEASE-i386.img et OPNsense-18.1.6-OpenSSL-série-amd64 (1) .img.

5. Faire tous les fichiers contigus sur le disque.

6. Utilisez le menu E2B pour sélectionner le fichier .imgPTN.

Bug dans MPI v0.078 et les versions précédentes:
Ne pas utiliser SWITCH_E2B.exe ou vous ne recevrez pas la possibilité de démarrer à partir de la 3ème partition (MPI a été fixé dans l' outil pack v0.079 +).

Grub4dos peuvent accéder aux fichiers sur une partition A5 de type FreeBSD très bien car il comprend le format de volume FreeBSD.

Pour ajouter d'autres versions FreeBSD à la E2B clé USB, il suffit de copier et renommer le fichier .imgPTN (ou faire une fraîche), puis renommer le fichier du nouveau memstick FreeBSD pour le match.

Notez que seules les images « » de memstick pour les lecteurs USB ne fonctionnent de cette façon. Heureusement, ghostbsd les fichiers sont au format memstick.

Pour l' installation / mise à niveau OpenBSD - voir le blog de karl . Pour installxx.iso OpenBSD , voir ce billet de blog .


FreeBSD 11 x64

Le format de fichier .img a changé pour FreeBSD11. Nous pouvons cependant UEFI boot (ou MBR-boot en utilisant Clover) comme suit:
FreeBSD-11.0-RELEASE-amd64- memstick.img

Utilisez GUI 7Zip pour ouvrir le fichier memstick.img
Extraire le fichier .ufs en tant que fichier unique grand directement sur votre E2B clé USB - par exemple \ _ISO \ LINUX \ .ufs
Renommer \ _ISO \ LINUX \ .ufs à \ _ISO \ LINUX \ FreeBSD11
Double-cliquez sur EFI image système en 7Zip pour l'ouvrir
Extraire le dossier entier EFI dans un nouveau FreeBSD11 dossier sur le bureau - par exemple , nous obtenons (bureau) \ FreeBSD11 \ EFI \ BOOT \ BOOTX64.EFI
Créer un fichier .imgPTN à partir du dossier FreeBSD11 sur le bureau
Copiez le FreeBSD11.imgPTN fichier \ _ISO \ LINUX sur votre E2B clé USB, vous avez maintenant:
\ _ISO \ LINUX \ FreeBSD11.imgPTN
\ _ISO \ LINUX \ FreeBSD11
Tous les fichiers doivent contigus
Passez au fichier FreeBSD11.imgPTN en utilisant le menu E2B (ne pas utiliser SWITCH_E2B.exe ou utiliser la dernière version et choisissez 0xA5 pour le type de partition lorsque vous êtes invité)

Remarque: Si vous souhaitez utiliser SWITCH_E2B.exe pour sélectionner le fichier FreeBSD11.imgPTN, vous devez alors modifier le \ fichier menu.lst dans le .imgPTN et ajoutez la ligne
parttype (hd0,2) 0xA5
au début du fichier \ menu.lst ou si SWITCH_E2B.exe vous demande le type, entrez 0xA5.


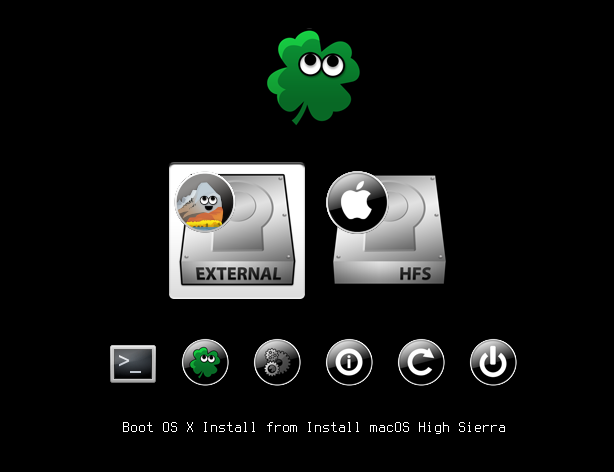
Utilisez l'option 'Clover 64 bits UEFI Boot Menu' ou directement UEFI-démarrage à partir du lecteur E2B.


MBR-boot ISO à base de FreeBSD (FreeBSD, OPNsense, pfSense, Nas4Free, TrueOS)
Un moyen plus facile d'utiliser cette méthode consiste à utiliser simplement. isoBSD extension de fichier (E2B v1.A5 +).

La méthode ci-dessous utilise votre propre fichier .imgPTN au lieu du fichier bsd.imgptn par défaut qui est déjà utilisé par .isoBSD ...


Vous devez utiliser MakePartImage v 0,079 ou plus tard pour cela. Le processus est essentiellement le même que pour les images memstick.

Je l' ai testé FreeBSD-11.1-RELEASE-amd64-bootonly.iso , TrueOS-Desktop-18,03-x64-DVD.iso , OPNsense-17.7.5-OpenSSL-dvd-amd64.iso, Nas4Free.iso et pfSense-CE 2.4. 4-RELEASE-amd64.iso .

FreeNAS 11 U4 et ghostbsd 11.1 ISOs ne pas travailler à l' aide de cette méthode.

1. Faites glisser-déposer un dossier vide sur le bureau pour FAT32_MPI raccourci créer un fichier FreeBSD.imgPTN.

2. Copiez le fichier FreeBSD.imgPTN au lecteur E2B - par exemple \ _ISO \ LINUX \ FreeBSD . imgPTN

Astuce: Vous pouvez utiliser une extension de fichier .imgPTNAUTO pour supprimer l'invite utilisateur.

3. Copiez le fichier ISO FreeBSD dans le même dossier et le renommer FreeBSD .

Remarque : Les deux fichiers peuvent avoir un nom que vous souhaitez, mais ils ne doivent pas contenir de points (sauf un point pour l'extension) et les deux fichiers noms doivent être identiques.

Vous devriez maintenant être en mesure de sélectionner le fichier .imgPTN et passer au menu CSM.

Dans le menu CSM, choisissez le 'Boot à FreeBSD sur 3 partition (mode MBR)' option de menu.


Définir une option de menu par défaut + délai d'attente dans le menu CSM
Boot au menu CSM et utiliser l'entrée de menu « Définir l'entrée de menu par défaut et délai d'attente » dans le menu CSM.


Vous pouvez modifier manuellement le \ E2B \ menu_defaults.txt choisir le menu # 4 et définir une valeur de délai d' attente ou 12 secondes: par exemple ,
définir dask = 4

par défaut 4
ensemble task = 12

délai d'attente 12

ensemble dask = 4 par
défaut 4
set task = 12
délai d' attente 12
FreeNAS et ghostbsd ISOs
MBR démarrage uniquement.

Cette procédure a également pour GhostBSD11.1-mate-amd64.iso .


1. Télécharger FreeNAS-11.1-U6.iso - renomme à FreeNAS11.ISO de laisser un seul point dans le nom du fichier.

2. Créez un dossier vide sur votre PC de bureau nommé FreeNAS11.

3. Utilisez 7Zip pour extraire le dossier \ boot de l'ISO au. \ FreeNAS11 dossier afin que vous avez maintenant un. \ FreeNAS11 \ dossier de démarrage et sous-dossiers.

4. Télécharger le grub2_for_imgPTN_v1.zip fichier - extraire le g2ldr fichier et copiez-le dans le dossier \ FreeNAS11..

5. Faites glisser-déposer le dossier FreeNAS11 sur le raccourci bureau MPI_FAT32 pour créer un fichier FreeNAS11.imgPTN.

6. Copiez le fichier FreeNAS11.imgPTN et le fichier FreeNas11.ISO dans le dossier \ _ISO \ LINUX sur votre lecteur E2B.

7. Renommez le fichier FreeNAS11.ISO à FreeNAS11 (supprimer l'extension de fichier .ISO).

\ _ISO \ LINUX \ FreeNAS11.imgPTN (environ 78Mo)
\ _ISO \ LINUX \ FreeNAS11 était le tout fichier .ISO (nom doit correspondre fichier .imgPTN et ne doit pas contenir de points)

MBR-boot dans le fichier .imgPTN et dans le menu CSM choisir l'option de menu g2ldr.

Si la sensibilité ISO est une version 64 bits uniquement, utilisez une extension de fichier de .imgPTNAUTO64 afin qu'il ne se répertorié sur les systèmes avec les processeurs 64 bits.

Si le nom du fichier contient un point, puis les deux fichiers seront répertoriés dans le menu Linux, assurer qu'il n'y a pas de points dans le nom du fichier. Si vous voulez vraiment avoir des points dans l'entrée de menu, ajoutez un fichier .txt à l'aide \ _ISO \ Txt_Maker.exe.

pfSense v2.4 démarrage UEFI

Vous trouverez des instructions à la fin de ce billet de blog .

La même procédure peut également fonctionner pour d'autres images memstick qui contiennent plusieurs images pour plusieurs partitions.

Notez que vous devez d'abord MBR-boot au menu CSM avant UEFI démarrage travaillerez.


Read more: http://www.easy2boot.com/add-payload-files/freebsd/

complete walkthrough for updating to or installing a fresh version of macOS Mojave.

350580
Index of tools :

First of all- congratulations! You're on your way to learning something new- always a challenge, but well worth the effort. Installing Mac OS X on generic PC hardware is not as hard as it used to be, however since there are so many methods, bootloaders, and guides out there it can be extremely confusing for the new user.

Here are a few things to start with.

1. Read our Rules thoroughly. Unlike most Internet communities our rules are strictly enforced. This is for everyone's benefit.

2. A good place to begin is the Simplest Mac OS X Installation Guide to familiarize yourself with a bird's eye view of the process. Afterward, check out our Installation > The Basics forum.

3. Read through the latest CustoMac Buyer's Guide for compatibility advice.

4. Use the Search- we've been around for years. Most likely your questions have already been answered.

5. Familiarize yourself with the forum by reading the Activity Stream.

6. Read through the CustoMac Glossary for detailed definitions of terms.

7. Learn how to post like a pro with the User’s Guide for the WYSIWYG Editor.

You'll be a pro in no time.


The following guide is a complete walkthrough for updating to or installing a fresh version of macOS Mojave. It requires no experience and all of the basic installation and post-installation tools are available on tonymacx86.com.

Table of Contents

Step 1: Download macOS Mojave

Step 2: Create a Bootable USB with UniBeast
Step 3: Recommended BIOS Settings
Step 4: Install macOS Mojave
Step 5: Post Installation with MultiBeast
Troubleshooting and Optimizations


Before You Begin

  1. Register here at tonymacx86! If you don't have a user account, create one!
  2. Get our latest UniBeast and MultiBeast tools from the downloads section.
  3. Purchase a 16GB or larger USB drive.
  4. Do a full backup of your system. We strongly recommend performing a full backup of your existing system using Carbon Copy Cloner. By doing this, you can always go back to your working installation.

UniBeast is a tool that creates a bootable installer out of your downloaded version of macOS. In order to start fresh, you'll need access to a functional computer running OS X Lion 10.7.5 or later. This is a requirement, as you need access to the Mac App Store to download macOS and create the installation drive. To start from scratch, booting the 10.6 Snow Leopard Retail DVD directly, check out iBoot + MultiBeast.

Existing Clover users may do a direct update to macOS Mojave by simply running the Install macOS Mojave app as normal Mac users would. Follow these steps: Update Directly to macOS Mojave.

STEP 1: Download macOS Mojave
The full operating system is a free download for anyone who has purchased Mac OS X Snow Leopard, Lion, or Mountain Lion or has a Mac preloaded with OS X Mavericks, Yosemite, El Capitan, macOS Sierra, or macOS High Sierra.

Download the Application from the Mac App Store using your Apple ID on any of these specific Macs:.
  • MacBook (Early 2015 or newer)
  • MacBook Air (Mid 2012 or newer)
  • MacBook Pro (Mid 2012 or newer)
  • Mac mini (Late 2012 or newer)
  • iMac (Late 2012 or newer)
  • iMac Pro (2017)
  • Mac Pro (Late 2013, plus mid-2010 and mid-2012 models with recommended Metal-capable GPU)
  1. Open Mac App Store
  2. Log in with your Apple ID
  3. Download macOS Mojave

The Application Install macOS Mojave will appear in /Applications.
STEP 2: Create a Bootable USB Drive with UniBeast
Take a deep breath and take your time- this is pretty simple, but it's easy to miss things if you rush. Follow each step to the letter.

  1. Insert the USB drive
  2. Open /Applications/Utilities/Disk Utility
  3. Highlight the USB drive in left column (Note: in the Mojave version of Disk Utility, you must first select View / Show All Devices before you can see the USB drive there)
  1. Click Erase button
  2. For Name: type USB (You can rename it later)
  3. For Format: choose Mac OS Extended (Journaled)
7. Click Erase then Done
  1. Download and run UniBeast
  2. Click Continue, Continue, Continue, Continue, Agree
  3. At Destination Select, choose USB and click Continue
  1. At Select OS Installation screen choose Mojave and click Continue
  2. At Bootloader Options screen choose UEFI Boot Mode or Legacy Boot Mode. UEFI Boot Mode is recommended for 7/8/9/100/200/300 Series CustoMac desktops and all UEFI capable systems. Legacy Boot Mode is recommended for 5/6 Series CustoMac desktops and all BIOS based systems.
  1. (Optional) At Graphics Configuration screen choose the appropriate graphics option for your system and click Continue.
  2. Verify installation options, then click Continue, enter password and click Install
371917
UniBeast will now create the bootable USB drive. The process will only take about 10 minutes, depending on system and drive speed. Do not unplug or stop during this time.
15. Drag MultiBeast to your completed USB drive.

Clover Note: UniBeast delivers basic bootloader support based on our testing on recommended CustoMac systems. For further bootloader customization, download and run the official Clover package. Advanced users may also compile Clover by downloading the full source.


STEP 3: Recommended BIOS Settings
If you're installing on a recommended CustoMac desktop with AMI UEFI BIOS, the options are simple. For other systems make sure to set your BIOS to Optimized Defaults, and your hard drive to AHCI mode. Here are standard AMI UEFI BIOS settings for
Gigabyte AMI UEFI BIOS, Gigabyte AWARD BIOS, ASUS AMI UEFI BIOS, and MSI AMI UEFI BIOS.

  1. To access BIOS/UEFI Setup, press and hold Delete on a USB Keyboard while the system is booting up
  2. Load Optimized Defaults
  3. If your CPU supports VT-d, disable it
  4. If your system has CFG-Lock, disable it
  5. If your system has Secure Boot Mode, disable it
  6. Set OS Type to Other OS
  7. If your system has IO Serial Port, disable it
  8. Set XHCI Handoff to Enabled
  9. If you have a 6 series or x58 system with AWARD BIOS, disable USB 3.0
  10. Save and exit.


STEP 4: Install macOS Mojave
You're almost done! All you need to do is boot from the USB drive and install! For best results, insert the USB in a USB 2.0 port.

  1. Turn on the computer
  2. Press the hotkey to choose boot device (F12 for Gigabyte motherboards, F8 for ASUS motherboards, F11 for ASrock motherboards)
  3. Choose USB

  1. At Clover boot screen, choose Boot OS X Install from Install macOS Mojave
  2. When you arrive at the Installer, choose language.

If you have issues reaching the installer, you can use spacebar on boot screen to enter alternate boot modes such as verbose and safe mode. For more instructions on entering boot flags see Clover Basics and Switching Advice.

6. For a new installation of macOS, you MUST erase and format the destination drive according to the following steps before continuing.
a. In the top menu bar choose Utilities, and open Disk Utility
b. Highlight your target drive for the Mojave installation in left column.​
c. Click Erase button​
d. For Name: type Mojave (You can rename it later)​
e. For Format: choose Mac OS Extended (Journaled)
f. Click Erase
g. Close Disk Utility
  1. When the installer asks you where to install, choose Mojave
  2. Upon completion, the system will automatically restart.
  3. Press the hotkey to choose boot device (F12 for Gigabyte motherboards, F8 for ASUS motherboards, F11 for ASrock motherboards)
  4. Choose USB
  5. At the Boot Screen, choose Mojave
  6. Complete macOS installation. The system will automatically reboot.

STEP 5: Post Installation with MultiBeast
MultiBeast is an all-in-one post-installation tool designed to enable boot from hard drive, and install support for Audio, Network, and Graphics. The installation is complete, but the drive isn't bootable yet. Boot from the USB again, this time choosing Mojave.
  1. Press the hotkey to choose boot device (F12 for Gigabyte motherboards, F8 for ASUS motherboards, F11 for ASrock motherboards)
  2. Choose USB
  3. At the Boot Screen, choose your new Mojave installation.
  4. Complete macOS setup
  5. Open and run MultiBeast
6. If this is a fresh installation, click Quick Start. UEFI Boot Mode is recommended for 7/8/9/100/200/300 Series CustoMac desktops and all UEFI capable systems. Legacy Boot Mode is recommended for 5/6 Series CustoMac desktops and all BIOS based systems.
  1. Choose the appropriate Drivers options for your system.
  2. Click Customize for further options
  1. Click Print or Save to back up your configuration
  2. Click Build then Install
380946
If using a GeForce GTX 1050, 1050 Ti, 1060, 1070, 1070 Ti, 1080, 1080 Ti, TITAN Pascal, and TITAN Xp 'Pascal' graphics card or NVIDIA GeForce GTX 750, 750 Ti, 950, 960, 970, 980, 980 Ti, and TITAN X 'Maxwell' graphics card, macOS Mojave graphics drivers are not natively supported. Alternate NVIDIA drivers are required.

Note: Alternate NVIDIA Graphics Drivers are not available yet- if you have a Maxwell or Pascal based NVIDIA card, stay on High Sierra for now.

  1. (Optional) Download and install Alternate NVIDIA Graphics Drivers
  2. Reboot

354912

Yay! You now have a fully updated bootable version of macOS Mojave on your CustoMac! And a super handy USB rescue drive. It's easy to get frustrated, but don't give up! If you get stuck, there are many users with similar hardware in the tonymacx86 Forum to provide support.

Thanks to all of the hard working developers, hackers, and testers all over the world without whom this guide would never have been possible.

Troubleshooting and Optimizations:
After you've completed the guide, things such as HDMI audio and iMessage may not work automatically. The list below should serve to fully optimize your system after initial setup.

[README] Common Problems/Changes/Fixes on Mojave
Mojave AppleHDA Audio
Update Directly to MacOS Mojave
[Guide] Intel Framebuffer patching using WhateverGreen
[GUIDE] Installing 3rd Party Kexts - El Capitan, Sierra, High Sierra, Mojave +
Solving NVIDIA Driver Install & Loading Problems
An iDiot's Guide To Lilu and its Plug-ins
An iDiot's Guide To iMessage
macOS Native CPU/IGPU Power Management
[ROUGH GUIDE] Fix for Finder Preview not working on Mojave 10.14.1+
[TOOL] [GENERATE PROPER PROBLEM REPORTING FILES]
[FAQ] READ FIRST! Laptop Frequent Questions
[Guide] Booting the OS X installer on LAPTOPS with Clover


This list will be updated.

Alternate NVIDIA Graphics Drivers
NVIDIA releases alternate graphics drivers separately on the web for each build of macOS. These are different from the drivers Apple ships as standard, and should be considered experimental. In the past, the drivers have been known to solve OpenCL issues with certain applications, as well as providing better native GPU power management for certain devices. These drivers are currently the only method to get full acceleration for GeForce GTX 1050, 1050 Ti, 1060, 1070, 1070 Ti, 1080, 1080 Ti, TITAN Pascal, and TITAN Xp 'Pascal' graphics cards and NVIDIA GeForce GTX 750, 750 Ti, 950, 960, 970, 980, 980 Ti, and TITAN X 'Maxwell' graphics cards. There are no current Macs with these cards, so support is absent natively in macOS.

Note: Alternate NVIDIA Graphics Drivers are not available yet- if you have a Maxwell or Pascal based NVIDIA card, stay on High Sierra for now.

Clover Bootloader Credits

UniBeast contains and delivers files from the Clover EFI Bootloader project. For more information and sources used see Clover EFI bootloader. Clover v2 is open source based on different projects: Clover, rEFIt, XNU, VirtualBox. The main is EDK2 latest revision.

Clover Note: UniBeast delivers basic bootloader support based on our testing on recommended CustoMac systems. For further bootloader customization, download and run the official Clover package. Advanced users may also compile Clover by downloading the full source.

Clover Developers:
Slice, with help of Kabyl, usr-sse2, jadran, Blackosx, dmazar, STLVNUB, pcj, apianti, JrCs, pene, FrodoKenny, skoczy, ycr.ru, Oscar09, xsmile, SoThOr, rehabman…

Source code credits:
Intel, Apple, Oracle, Chameleon, rEFIt and Xom.

Clover Source and Downloads:
Sourceforge: Clover

http://www.tonymacx86.com/yosemite-desktop-guides/144426-how-install-os-x-yosemite-using-clover.html

beta.jpg

Here's a quick guide to create an El Capitan Public Beta Installation USB using Clover based on the Yosemite 10.10 Clover guide. Please note, this guide is not universal, and may not work for all systems.

UPDATE: System security has changed in Public Beta 3+. Config.plists have been updated with SIP removal RtVariables. The latest version of Clover is required for kext injection to work. For more information please read: Explaining OS X El Capitan Security Changes - Workarounds and Current Information.

STEP 1: Download OS X El Capitan Public Beta

1. Enroll in the Free Apple Beta Software Program
2. Open Mac App Store
3. Log in with your Apple ID
4. Redeem code
4. Download OS X El Capitan Public Beta

The Application Install OS X El Capitan Public Beta will appear in /Applications.


STEP 2: Prepare Bootable USB Drive
This step extracts the OS X Installer contents, then installs Clover bootloader to the USB stick.

1. Insert the USB drive
2. Open /Applications/Utilities/Disk Utility
3. Highlight the USB drive in left column
usb.png
4. Click on the Partition tab
5. Click Current and choose 1 Partition
6. Click Options...
7. Choose GUID Partition Table
8. Under Name: type USB (You can rename it later)
9. Under Format: choose Mac OS Extended (Journaled)
10. Click Apply then Partition
11. Open /Applications/Utilities/Terminal
12. Type the following, enter password and hit enter. This command completely erases the USB, then creates native OS X installer media from the Install OS X El Capitan Public Beta Application.

(For Public Beta)
Code:
sudo /Applications/Install\ OS\ X\ El\ Capitan\ Public\ Beta.app/Contents/Resources/createinstallmedia --volume /Volumes/USB --applicationpath /Applications/Install\ OS\ X\ El\ Capitan\ Public\ Beta.app --nointeraction
(For GM Candidate)
Code:
sudo /Applications/Install\ OS\ X\ El\ Capitan\ GM\ Candidate.app/Contents/Resources/createinstallmedia --volume /Volumes/USB --applicationpath /Applications/Install\ OS\ X\ El\ Capitan\ GM\ Candidate.app --nointeraction
(For Final Release)
Code:
sudo /Applications/Install\ OS\ X\ El\ Capitan.app/Contents/Resources/createinstallmedia --volume /Volumes/USB --applicationpath /Applications/Install\ OS\ X\ El\ Capitan.app --nointeraction
Screen Shot 2015-07-09 at 4.45.26 PM.png

Upon completion, the USB will be renamed Install OS X El Capitan Public Beta.

13. Download the latest version of Clover from sourceforge
14. Open Clover package installer
15. Hit Continue, Continue, Change Install Location...
16. Choose the USB, now called Install OS X El Capitan Public Beta
17. Hit Customize and install Clover to the same USB
18. Navigate to /EFI/CLOVER/ and replace default config.plist with attached config.plist *
19. Navigate to /EFI/CLOVER/kexts/10.11/ and add FakeSMC.kext
20. (Optional) Navigate to /EFI/CLOVER/kexts/10.11/ and add your ethernet kext
21. (Optional) Navigate to /EFI/CLOVER/kexts/10.11/ and add NullCPUPowerManagement.kext
22. (Optional) Navigate to /EFI/CLOVER/drivers64UEFI/ remove VBoxHfs-64.efi and add HFSPlus.efi
23. (Optional) Navigate to /EFI/CLOVER/ACPI/patched/ and add DSDT.aml and SSDT.aml

*See attached config.plist for a working minimal configuration.

Your Clover Installation USB is now finished.

For post installation instructions and screenshots, please see
http://www.tonymacx86.com/yosemite-desktop-guides/144426-how-install-os-x-yosemite-using-clover.html

Clover Developers:
Slice, with help of Kabyl, usr-sse2, jadran, Blackosx, dmazar, STLVNUB, pcj, apianti, JrCs, pene, FrodoKenny, skoczy, ycr.ru, Oscar09, xsmile, SoThOr…

Source code credits:
Intel, Apple, Oracle, Chameleon, rEFIt and Xom.

Official Clover Links:
Sourceforge: Clover
Clover Wiki
Clover Configurator
Sample config.plists:
Select the sample config.plist for your system.
config.plist Standard
For desktop systems with ATI/AMD Radeon HD 5xxx, 6xxx, 7xxx, R9 2xx, 3xx, NVIDIA GeForce 6xx, 7xx, 9xx, TITAN. Equivalent to Chimera/Chameleon GraphicsEnabler=No IGPEnabler=Yes.

config plist - Inject Intel HD 3000
For desktop systems with Intel HD 3000. Equivalent to Chimera IGPEnabler=Yes.

config plist - Inject NVIDIA
For desktop systems with older NVIDIA graphics cards such as GeForce 8xxx, 9xxx, 2xx, 4xx, 610, and 630. Equivalent to Chimera/Chameleon GraphicsEnabler=Yes.

config plist - Inject ATI
For desktop systems with older ATI graphics cards such as ATI Radeon 4xxx. Equivalent to Chimera/Chameleon GraphicsEnabler=Yes.​
 

Attachments

Direct Update to OS X El Capitan using Clover


Direct Update to OS X El Capitan using Clover

​Established Clover users on OS X Yosemite who wish to update directly to OS X El Capitan can do so just like a regular Mac would. This fully native method requires no USB creation or preparation.

Before you begin, we strongly recommend performing a full backup of your existing system using Carbon Copy Cloner. By doing this, you can always go back to your working OS X Yosemite installation.

1. Download the latest version of Clover from sourceforge and update your existing Clover install.

2. Open Clover configuration folder on the root of your system drive or EFI Partition. Copy FakeSMC.kext and any other extra necessary kexts from /EFI/CLOVER/kexts/10.10/ to /EFI/CLOVER/kexts/10.11/. If you need essential kexts, download them here.

Screen Shot 2015-09-10 at 11.49.52 AM.png

3. Open /EFI/CLOVER/config.plist with TextEdit and add the following BooterConfig and CsrActiveConfig keys to RtVariables section. This will partially disable SIP (System Integrity Protection) when booting OS X El Capitan.


Code:
    RtVariables
    
        BooterConfig
        0x28
        CsrActiveConfig
        0x3
    
Screen Shot 2015-09-10 at 9.51.03 AM.png 4. Download Install OS X El Capitan Application from the Mac App Store. When complete, the app will open. Please note, the Application will disappear after use.

5. Choose system drive for install (Example: Macintosh HD). When complete, the computer will automatically reboot.

6. When Clover boot screen appears, choose Boot OS X Install option (Example: Boot OS X Install from Macintosh HD). Choosing your system drive will go back to your previous installation without updating.

7. Complete the OS X installation process. When complete, the computer will automatically reboot.

8. When Clover boot screen appears, choose Boot Mac OS X option (Example: Boot Mac OS X from Macintosh HD). The computer will then complete the update.

:thumbup:

Related:
http://www.tonymacx86.com/el-capitan-desktop-guides/167901-how-create-os-x-el-capitan-public-beta-installation-usb-using-clover.html
http://www.tonymacx86.com/alternate-bootloaders/128018-tonymacx86-clover-theme.html
 

Sourceforge: Clover UniBeast, and MultiBeast without access to a Mac.


elcap-ub.png
The following guide is a complete walkthrough for updating to or installing a fresh version of OS X El Capitan. It requires no experience and all of the basic installation and post-installation tools are available on tonymacx86.com.

Table of Contents
Step 1: Download OS X El Capitan
Step 2: Create a Bootable USB with UniBeast
Step 3: Recommended BIOS Settings
Step 4: Install OS X El Capitan
mb_circle-sm.png Step 5: Post Installation with MultiBeast
clover-circle-sm.png Step 6: Alternate Post Installation
Troubleshooting and Optimizations


Before You Begin

1. Register here at tonymacx86! If you don't have a user account, create one!
2. Get our latest UniBeast and MultiBeast tools from the downloads section.
3. Purchase a 16GB or larger USB drive.
4. Do a full backup of your system. We strongly recommend performing a full backup of your existing system using Carbon Copy Cloner. By doing this, you can always go back to your working installation.

UniBeast is a tool that creates a bootable installer out of your downloaded version of OS X. In order to start fresh, you'll need access to a functional computer running Mac OS X Snow Leopard 10.6.8 or later. This is a requirement, as you need access to the Mac App Store to download OS X and create the installation drive. To start from scratch, booting the 10.6 Snow Leopard Retail DVD directly, check out iBoot + MultiBeast.

For the first time tonymacx86.com is recommending Clover as your default bootloader. If you have followed updates until OS X Yosemite using Chimera, check out Clover Basics and Switching Advice.

Existing Clover users may do a direct update to OS X El Capitan by simply running the Install OS X El Capitan app as normal Mac users would. Follow these steps: Direct Update to OS X El Capitan using Clover.


STEP 1: Download OS X El Capitan
The full operating system is a free download for anyone who has purchased Mac OS X Snow Leopard, Lion, or Mountain Lion or has a Mac preloaded with OS X Mavericks or Yosemite. Download the Application from the Mac App Store using your Apple ID on any Mac or functional computer running Mac OS X 10.6.8 or later.

1. Open Mac App Store
2. Log in with your Apple ID
3. Download OS X El Capitan

The Application Install OS X El Capitan will appear in /Applications.
buyElCap.png


STEP 2: Create a Bootable USB Drive with UniBeast
Take a deep breath and take your time- this is pretty simple, but it's easy to miss things if you rush. Follow each step to the letter.

1. Insert the USB drive
2. Open /Applications/Utilities/Disk Utility
3. Highlight the USB drive in left column
createUSB.png
diskutil-1.png
4. Click on the Partition tab
5. Click Current and choose 1 Partition
diskutil-2.png
6. Click Options...
7. Choose GUID Partition Table
diskutil-3.png
8. Under Name: type USB (You can rename it later)
9. Under Format: choose Mac OS Extended (Journaled)
10. Click Apply then Partition
diskutil-4.png
11. Download and run UniBeast
12. Click Continue, Continue, Continue, Continue, Agree
13. At Destination Select, choose USB and click Continue
ub1.png
14. At Select OS Installation screen choose El Capitan and click Continue
ub2.png
15. At Bootloader Options screen choose UEFI Boot Mode or Legacy Boot Mode. UEFI Boot Mode is recommended for 7/8/9+ Series CustoMac desktops and all UEFI capable systems. Legacy Boot Mode is recommended for 5/6 Series CustoMac desktops and all BIOS based systems.
ub3.png
16. (Optional) At Graphics Configuration screen choose the appropriate graphics option for your system and click Continue.
17. Verify installation options, then click Continue, enter password and click Install
ub5.png
UniBeast will now create the bootable USB drive. The process will only take about 10 minutes, depending on system and drive speed. Do not unplug or stop during this time.
ub6.png
18. Drag MultiBeast to your completed USB drive.

Clover Note: UniBeast delivers basic bootloader support based on our testing on recommended CustoMac systems. For further bootloader customization, download and run the official Clover package. Advanced users may also compile Clover by downloading the full source.


STEP 3: Recommended BIOS Settings
If you're installing on a recommended CustoMac desktop with AMI UEFI BIOS, the options are simple. For other systems make sure to set your BIOS to Optimized Defaults, and your hard drive to AHCI mode. Here are standard AMI UEFI BIOS settings for Gigabyte AMI UEFI BIOS, Gigabyte AWARD BIOS, ASUS AMI UEFI BIOS, and MSI AMI UEFI BIOS.

1. To access BIOS/UEFI Setup, press and hold Delete on a USB Keyboard while the system is booting up
2. Load Optimized Defaults
3. If your CPU supports VT-d, disable it
4. If your system has CFG-Lock, disable it
5. If your system has Secure Boot Mode, disable it
6. Set OS Type to Other OS
7. If your system has IO SerialPort, disable it
8. Set XHCI Handoff to Enabled
9. If you have a 6 series or x58 system with AWARD BIOS, disable USB 3.0
10. Save and exit.
gigabyte-z87x-ud7-th-1.jpeg

STEP 4: Install OS X El Capitan
You're almost done! All you need to do is boot from the USB drive and install! For best results, insert the USB in a USB 2.0 port.

1. Turn on the computer
2. Press the hotkey to choose boot device (usually F12, F11, F10, or F:cool:
3. Choose USB
4. At Clover boot screen, choose Boot Mac OS X from USB
5. When you arrive at the Installer, choose language.
installElCap.png
If you have issues reaching the installer, first make sure you're using a USB 2.0 port. If you're using a NVIDIA graphics card you may need to enter the extra boot flag nv_disable=1 to reach the installer. For instructions on entering boot flags see Clover Basics and Switching Advice.
Snapshot 9.png
6. For a new installation of OS X, you MUST erase and format the destination drive according to the following steps before continuing.
a. In the top menu bar choose Utilities, and open Disk Utility
b. Highlight your target drive for the El Capitan installation in left column.
c. Click Erase button
d. For Name: type El Capitan (You can rename it later)
e. For Format: choose OS X Extended (Journaled)
f. For Scheme: choose GUID Partition Map
g. Click Erase
h. Close Disk Utility
7. When the installer asks you where to install, choose El Capitan, or your existing install.
8. Upon completion, the system will automatically restart.


STEP 5: Post Installation with MultiBeast
MultiBeast is an all-in-one post-installation tool designed to enable boot from hard drive, and install support for Audio, Network, and Graphics. The installation is complete, but the drive isn't bootable yet. Boot from the USB again, this time choosing El Capitan.

1. Turn on the computer
2. Press the hotkey to choose boot device
3. Choose USB
4. At the Boot Screen, choose your new El Capitan installation.
5. Complete OS X El Capitan setup
mb_circle.png
6. Open and run MultiBeast. If your system requires installing Clover to the root of the drive, such as Gigabyte 6 Series and X58 systems, skip to STEP 6.
multibeast-1.png
7. If this is a fresh installation, click Quick Start. UEFI Boot Mode is recommended for 7/8/9+ Series CustoMac desktops and all UEFI capable systems. Legacy Boot Mode is recommended for 5/6 Series CustoMac desktops and all BIOS based systems.
multibeast-2.png
8. Choose the appropriate audio and network options for your system:
MultiBeast-3.png
9. Click Customize for further options
multibeast-4.png
10. Click Print or Save to back up your configuration
11. Click Build then Install
multibeast-5.png
If using a NVIDIA 'Maxwell' GeForce GTX 750, 750 Ti, 950, 960, 970, 980, 980 Ti, or TITAN X graphics card, OS X graphics drivers are not natively supported. Alternate NVIDIA drivers are required. If drivers do not initiate, add nvda_drv=1 to Clover config.plist under Boot > Arguments.

12. (Optional) Download and install Alternate NVIDIA Graphics Drivers
13. Reboot

elcap-desktop.jpg

Yay! You now have a fully updated bootable version of OS X El Capitan on your CustoMac! And a super handy USB rescue drive. It's easy to get frustrated, but don't give up! If you get stuck, there are many users with similar hardware in the tonymacx86 Forum to provide support.

Thanks to all of the hard working developers, hackers, and testers all over the world without whom this guide would never have been possible.


STEP 6: Alternate Post-Installation
This alternate post-installation method was in place before MultiBeast was released. If you have already used MultiBeast you do not need to follow these steps. Follow this method if your system requires installing Clover to the root of the drive.

1. Press the hotkey to choose boot device
2. Choose USB
3. At Clover boot screen, choose Boot Mac OS X from El Capitan
4. Complete OS X El Capitan setup
5. Download El Capitan Post-Install Tools
clover-circle-medium.png
The Post-Installation.zip contains two custom Clover installers and essential kexts. This will provide boot from hard drive in place of MultiBeast. Alternately, continue booting from the USB drive.

6. Run one of the custom Clover installers. UEFI Boot Mode (Clover_v2.3k_r3320_UEFI.pkg) is recommended for 7/8/9+ Series CustoMac desktops and all UEFI capable systems. Legacy Boot Mode (Clover_v2.3k_r3320_Legacy.pkg) is recommended for 5/6 Series CustoMac desktops and all BIOS based systems. Legacy Boot Mode - Root (Clover_v2.3k_r3320_Legacy_Root.pkg) is for older systems that cannot boot from EFI partition. For further bootloader customization, download and run the official Clover package. For further bootloader customization, download and run the official Clover package.
7. Run CustoMac Essentials to install FakeSMC and Ethernet support.

The next steps configure the system definition, configure graphics, and provide it with a unique serial number.

8. Download and open Clover Configurator
9. Your config.plist should auto-mount. If not, choose Mount EFI Partition.
10. Select SMBIOS tab
11. Press Magic Wand Icon
12. Choose a System Definition from the list. Then choose a version of the system from the dropdown. This will auto-populate your config.plist with appropriate SMBIOS information including a unique serial number. If you're unsure what to choose, Mac Pro 3,1 will work for most desktop systems.
13. (Optional) If you have an existing Chimera SMBIOS located at /Extra/smbios.plist, you can choose the same system definition in Clover Configurator, then copy that serial number into your config.plist manually.
14. (Optional) If you configured graphics for the UniBeast installation, open Graphics tab and select Inject NVIDIA or Inject ATI.
15. Save and close Clover Configurator.

The next optional steps configure the system's Realtek ALC onboard audio codec.

16. (Optional) Download CloverALC110 script
17. (Optional) Browser/Click on download file
18. (Optional) Finder/Double click .command file
19. (Optional) Go through steps in Terminal to install appropriate audio choices

If using a NVIDIA 'Maxwell' GeForce GTX 750, 750 Ti, 950, 960, 970, 980, 980 Ti, or TITAN X graphics card, OS X graphics drivers are not natively supported. Alternate NVIDIA drivers are required. If drivers do not initiate, add nvda_drv=1 to Clover config.plist under Boot > Arguments.

20. (Optional) Download and install Alternate NVIDIA Graphics Drivers
21. Reboot


Troubleshooting and Optimizations:
After you've completed the guide, things such as HDMI audio and iMessage may not work automatically and universally. The list below should serve to fully optimize your system after initial setup.

Clover Basics and Switching Advice
Big List of Solutions for El Capitan Install Problems
How to Fix iMessage
HDMI Audio
Create a Clover Test USB Using UniBeast
How to Backup and Remove Chimera and any Related Files
How to Enter/Edit Boot Flags in Clover
How to Edit Clover config.plist
How to Mount EFI Partition
How to Set Clover to Automatically Boot System Drive
[GUIDE] Remove extra Clover BIOS boot entries & prevent further problems
OS X Configuration, Tuning & Utility Tools
How To Show Hidden Files in Finder
[Guide] Airport - PCIe Half Mini v2
Continuity and Handoff Capable Apple Mini Cards + PCIe and mini-PCIe Adapters
Direct Update to OS X El Capitan Using Clover
Laptop Compatibility
Quick Guide to Generate a SSDT for CPU Power Management
[READ ME FIRST!] Graphics Setup & Troubleshooting
Solving NVIDIA Driver Install & Loading Problems
CustoMac Desktop USB Fixes - OS X 10.11 El Capitan - Reference
[Guide] 10.11+ USB changes and solutions
DSDT Database | tonymacx86.com
The Basics

Alternate NVIDIA Graphics Drivers
NVIDIA releases alternate graphics drivers separately on the web for each OS X build. These are different from the drivers Apple ships as standard, and should be considered experimental. In the past, the drivers have been known to solve OpenCL issues with certain applications, as well as providing better native GPU power management for certain devices. They also will enable 'Maxwell' cards to work with full acceleration- NVIDIA GeForce GTX 750, 750 Ti, 950, 960, 970, 980, 980 Ti, and TITAN X.

http://www.tonymacx86.com/threads/nvidia-releases-alternate-graphics-drivers-for-os-x-10-11-6-346-03-15.198033/

Clover Bootloader Credits
UniBeast contains and deliver files from the Clover EFI Bootloader project. For more information and sources used see Clover EFI bootloader. Clover v2 is open source based on different projects: Clover, rEFIt, XNU, VirtualBox. The main is EDK2 latest revision.

Clover Note: UniBeast delivers basic bootloader support based on our testing on recommended CustoMac systems. For further bootloader customization, download and run the official Clover package. Advanced users may also compile Clover by downloading the full source.

Clover Developers:
Slice, with help of Kabyl, usr-sse2, jadran, Blackosx, dmazar, STLVNUB, pcj, apianti, JrCs, pene, FrodoKenny, skoczy, ycr.ru, Oscar09, xsmile, SoThOr, rehabman…

Source code credits:
Intel, Apple, Oracle, Chameleon, rEFIt and Xom.

Clover Source and Downloads:
Sourceforge: Clover
 

 installation.png
Here, in the simplest of terms, is the method for retail Mac OS X installation using iBoot, UniBeast, and MultiBeast without access to a Mac. If you have access to a Mac, use the default UniBeast guide on it's own.

1. Purchase Snow Leopard Retail DVD
2. Use iBoot + MultiBeast to install Snow Leopard
3. Update to Snow Leopard 10.6.8
4. Purchase OS X Application
5. Prepare UniBeast USB Installation Drive
6. Fresh install OS X
7. Post installation using MultiBeast

Hope this helps. :thumbup:


iBoot 10.6 Guide http://tonymacx86.blogspot.com/2010/04/ ... -x-on.html
UniBeast 10.7 Guide http://tonymacx86.blogspot.com/2011/10/ ... using.html
UniBeast 10.8 Guide http://www.tonymacx86.com/threads/unibeast-install-os-x-mountain-lion-on-any-supported-intel-based-pc.60584/
UniBeast 10.9 Guide http://www.tonymacx86.com/threads/unibeast-install-os-x-mavericks-on-any-supported-intel-based-pc.112389/
UniBeast 10.10 Guide http://www.tonymacx86.com/threads/unibeast-install-os-x-yosemite-on-any-supported-intel-based-pc.143976/
UniBeast 10.11 Guide http://www.tonymacx86.com/threads/unibeast-install-os-x-el-capitan-any-supported-intel-based-pc.172672/
tonymacx86 Downloads: downloads
Last edited:


Joined
Mar 28, 2012
Messages
29
Mac
Classic Mac
Mobile Phone


Thanks for this MacMan! Of course, this works great (if used correctly). I've use this post to make my Snow Leopard installation work too. This looks like a lot of stuff, but the whole process only takes about 2 hours. 3 if you include putting the parts together to build your system.

Here's how:

* Purchase Snow Leopard upgrade DVD as per instructions above or here: Mac OS X 10.6 Snow Leopard - Apple Store (U.S.)

* Download appropriate DSDT file for motherboard & save to USB Flash drive (I used a 4GB).

* Download iBoot & burn to CD/DVD.

* Download SL 10.6.8 Combo Update from Apple, here: Mac OS X 10.6.8 Update Combo v1.1

& save to USB Flash drive with your DSDT.

* Download Multibeast for Snow Leopard & save to USB Flash drive.

* Build system as per instructions with 1.5TB HDD installed (you'll have to slice it up once you get to the installation).

* Boot with iBoot

* Use Disk Utility to slice 1.5TB drive at 600GB boot partition, named "Snow Leopard HD" & the other 900GB partition named "Extra"

* Install Snow Leopard as per 'regular' instructions.

* When "done" have boot0 error, so remove this HD for now...

* Install another 500GB HDD (could use a drive as small as 20GB as long as it's SATA or Solid State) & install SL exactly the same way on this drive, EXCEPT make only 1 partition as per TonyMacx86's original instructions.

** NOTE ** I suggest that you name the partition something simple, like "Mac HD" & NOT the same thing you named your other boot partition.

* Once THIS drive is built, you will NOT have the boot0 error, unless they change the architecture on the smaller drives too.

* Put leave the smaller (good) drive in the system & put the bigger (not booting) drive in with it. If your drive is 6GB/S drive, you can now move it to the white SATA controller port too.

* Boot the system (to the only drive that works).

* Once your system is up, open Drive Utility. Unmount the the first drive you built with the boot0 error, the "not booting" drive, that's named "Snow Leopard HD".

* Open a Terminal window. I suggest you take a moment to understand what you're going to do next.

First, you will not be able to use MacMan's command unless you can su to root first. Since you probably don't know what that means, you can't use the command.

You need to use "sudo" to make the command work. I suggest you take a couple of minutes to get the info on "sudo", by typing (yup, you guessed it!!) "info sudo" in the terminal window. You can arrow down to go down the page & press "q" to "quit" & get out of info. Using "sudo" is sort of like "assuming the identity of root" from now on.

In the Terminal window once you type 'sudo' & the command, you'll have to enter your password to execute the command. Also, in OSX from there on out YOU ARE root too, so any other commands you type can be dangerous. You only have to type sudo once!! So if you mess up the command that MacMan has graciously given us, you don't have to type 'sudo' again.

* Take a deep breath. Take a shot of Tequila. OK. You're ready...

The drive you booted from is named "Snow Leopard HD". The drive you didn't boot from is named "Mac HD". So, the command is :

sudo dd if=/Volumes/Mac\ HD/usr/standalone/i386/boot1h of=/dev/disk0s2

*** But Wait *** Don't type that command!! Copy it & Paste it!! That away you'll be sure to get it right. YES, Terminal WILL let you copy & paste (of course, one is no good without the other). So, copy this whole post & put it in a Text File & put THAT on your USB Flash drive too.

* OK. That wasn't too bad. If you saw some messages that said you messed up, you need to press the "UP" arrow to bring your last command back & then modify the command. You probably messed up the "Mac\ HD" thing. Make sure to take the "sudo" off the front of the command though.

* If you didn't see a message that said you messed up, then you were successful.

* Shut down your system. Remove the smaller drive & boot up your new Snow Leopard Installation!!!

***** Good Luck ***** Thanks MacMan & Tonymacx86 ***** Consider making a donation to keep this site working

AUR Archlinux FR

AUR Archlinux FR

ArchwikiFR Accueil Forum Wiki Bugs Paquets AUR Télécharger Planète ...

Derniers évènements :